Weekend Draping Intensive!

e4647073-f31c-4a42-9a81-3db5fbb9b42b.jpg

Greetings friends…

ON JULY 16TH AND 17TH, 2016 I WILL TEACHING A WEEKEND DRAPING INTENSIVE CLASS AT WORKROOM SOCIAL !!!

This will be another time of creative “playing with muslin on a mannequin”. You will be able to drape and create the basic building blocks of clothing patterns, and be able to understand what makes garments what they are in terms of shape and in fit to the body! This can be helpful to your sewing skills as you more deeply understand how your favorite styles of clothing are created and sewn. I will teach you how to take the basic garment patterns you’ve draped and create the simple style variations to the pattern that may be your favorite style to wear. Come have fun with us this summer in draping class.!! You can register at the Workroom Social website at workroomsocial.com

Sewing Friends

IMG_2466.jpg

Just talking about friends here in this posting.

My friend Nancy ( pictured above ) moved away to another state  recently and I will miss her!  It’s just as simple as that.

Some of you who  do more quilting than garment sewing may recognize Nancy from where she used to work at the City Quilter. Nancy has decided to take both her summer and, especially, her WINTER living to warmer climates. I really don’t blame her for that, considering the NY winters we have been having (–no, suffering through..) in recent years. I wouldn’t mind 73 degrees, no humidity, and no snow in January!

Nancy welcomed me into the quilting world and didn’t hold it against that I was  mainly a garment sewing person with a bad fabric addiction (quilting cottons make SUCH COMFORTABLE   clothing. I HAD to use them. And OH BOY- the colors!!!) Yeah- I think I have been stung by a  quilting bee. I will probably do more quilting since I discovered a whole new set of sewing friends that “come with”.

Don’t get it too twisted. I would never give up on my first love of garment sewing. On the contrary, I am now looking to see how many quilting techniques I can incorporate into garments. Turns out there is a lot  of creative things I can do in garment sewing, now that I am armed with some quilting skills. Hoping to show that off in the future as I sew for myself.

Oh yeah- the last thing Nancy asked me to do for her before her move was to make  her a corset! Sort of like a going away present. So I did! Nancy picked the fabric and I used a “fat quarter” for the binding of the corset edges and  for the modesty panel in the back of the corset. I set the grommets myself. I had a fun time making this corset for Nancy. She loved it.

IMG_2448.jpg IMG_2449.jpg IMG_2450.jpg IMG_2452.jpg IMG_2455.jpg IMG_2453.jpg IMG_2457.jpg

I am probably going to be doing more sewing for me in the coming seasons.  I need a rest from sewing for other people and I’m  feeling  like I am the  “abandoned stepchild” of my own sewing room and  sewing skills.  As far as sewing for others -Most people appreciate my sewing work, some don’t.  It can be hurtful to me sometimes when some don’t appreciate the work that goes into a custom made garment, but its ALL GOOD. I have learned  valuable lessons about myself, about  people and about  sewing with each sewing  encounter I’ve had.  I will DEFINITELY keep teaching sewing as others allow me to come into their creative sewing world. But I think it’s ME time.

Lastly -Nancy introduced me to two other wonderful sewing friends.  I mention them here in honor of mentioning Nancy.

One is Andrea- the owner of Gotham Quilts. Knowing Andrea has not only added a kindred sewing person to my life,  Gotham Quilts has  also  added more fabric to my already bad  fabric addiction. It’s wonderful !!

The other is named  Teri.

IMG_2467.jpg

Teri is  fun woman!  You can see us here just goofing off for the camera. But seriously- Teri is an amazing and highly knowledgeable and skilled quilter. She is a Bernina Ambassador  and has helped me to learn and  get the most out of using my new Bernina machine.  Teri also keeps me laughing ( as you can see) and I appreciate her  lively, but dry sense of humor. Teri has a blog ( Terificreations.wordpress.com ) that I follow  not only because she is a friend, but I get to “expand my sewing horizons” by taking a look at the  news, and notes, and the links  that Teri posts there. It’s pretty good !

Well those are the two sewing friend gifts that Nancy left me before Nancy moved away. Nice to know I can still  text Nancy tonight and tell her  THANKS for  being a friend and leaving the friends to me that she has.

Happy sewing y’all.


Draping again!

e4647073-f31c-4a42-9a81-3db5fbb9b42b.jpg

Been a few weeks since my last post! Took an early summer vacation after sewing for wedding season, enjoyed being with my family in fresh air and rest. Sewing during vacation?? Hmmm… not so much!   But I am well rested and will be starting up sewing  and teaching again.

That being said:

I wanted to announce that ON JULY 16TH AND 17TH, 2016  I WILL TEACHING A WEEKEND DRAPING INTENSIVE  CLASS AT WORKROOM SOCIAL !!!

This will be another time of creative “playing with muslin on a mannequin”.  You will be able to  drape and create the basic building  blocks of clothing patterns,  and be able to  understand what makes garments what they are in terms of  shape and in fit to the body! This  can be helpful to your sewing skills as you more deeply understand how your favorite styles of clothing are created and sewn.  I will teach you how to take the  basic garment patterns you’ve draped and create the simple style  variations  to the pattern that may be your favorite style to wear.  Come have fun with us  this summer in draping class.!! You can register at  the Workroom Social website at workroomsocial.com

SEE YOU THERE !!


Bride “B”

Last November I posted pictures of a couple of brides  dresses that I had been working on for the fall.  I featured “Bride  A” and “Bride B”. As you may recall I had not gotten pictures of ” Bride B” in her dress  – until now…  Take a peek!

As I wrote:

Bride “B” wanted an organic cotton, strapless, sweetheart neckline, A-line, lined in silk and cotton, floor length dress, with a 4 foot long (church length) train.We put a crinoline under the skirt for a gentle “poof” underneath. Bride and her mom picked out the lace for the bustier part of the dress. I thought it was a beautiful lace choice.

I am pleased at how the dress turned out and I am glad that Bride ( and  her MOM …) were also pleased with the dress.  From the message I got from Mother of the bride, the wedding day was fun  and joyous, and the bride felt good in her dress! YAY!

IMG_1982.jpg     IMG_1994.jpg      IMG_1996.jpg

B&E (163 of 221).jpeg

B&E (173 of 221).jpeg

B&E (200 of 221)-1.jpeg

B&E (199 of 221).jpeg

B&E (162 of 221).jpeg

Best Wishes to the happy couple!


Nina’s First Steps- completed!

IMG_2188.jpg IMG_2186.jpg

Probably like millions of other  sewing machine owners, I named my new sewing machine. Probably like millions of other Bernina owners I have named my   new machine “Nina”. Easy to do! Covenient to do- especially when you want  an easy name to both bless the machine when it does well, and curse the machine if it does something crazy when you are trying to get a project done by a certain time. Okay  so maybe I am  the only one  who does this!

Anyway…I am blessing Nina. Profusely.

Her first steps sewing in my  little sewing place were a bundle of bras I created for a friend. Nina did well and I am happy with her. I made 6 “work-a-day” regular bras for  my friend G. who wanted every day  basic lingerie.  You know those “old faithful” garments that you roll out of bed, throw on, and run out  of the door to get to work on time. Yep-  sewing them worked out great on Nina. Just posting the pics  here to record what I have sewn- all in the interest of having this blog help me archive and  remember. I  can see the pictures which help me remember the techniques I have used to create the garment.

As I get the time I will post the techniques  in  the sewing process. I am thinking, though, that  ” everybody and her sister” is now sewing bras.  OK -I read that  ” everybody/sister” statement  recently on the Curvy Sewing Collective, but I guess I agree with it. If you  search the site you can even find a pattern for a free bra  that was posted for Feb 2016.  Also-with Beverly Johnson now with a Craftsy  bra making class and her blog , I may not need to show a lot of technique here. Beverly taught me, and  I feel  Beverly’s class is pretty good.

AND SO- Nina’s first steps- completed! Baby girl machine  is helping me to crank  it out, and it’s  ALL good! Love it!

IMG_2172.jpg IMG_2178.jpg

IMG_2185.jpg IMG_2189.jpg

Lastly…

( Warning- here comes a shameless advertisement, but here goes –) If you are interested in having fun, expanding your sewing and pattern making skills, and playing with fabric on the mannequin, sign up for  the Weekend Draping Intensive at Workroom Social. It’s happening on April 2nd & 3rd in the Brooklyn Workroom Social studio. I’ll be teaching the basics of draping and  we can work together to help  you take those draping skills and boost your overall  sewing skills  up  to the next level.

Going on with Nina into the next project. I’ll keep you posted!

Be Well. Happy sewing

Sharon

Draping Time! C’mon and play!

IMG_2176.jpg

As I continue on in my sewing journey, I am grateful to get  the chance to share a little bit of what I know  in sewing and design with other sewing people.  It’s great to get together with others who ( like me )wish to expand their  sewing skills and learn  more  design techniques  to help them better  express their creativity in garment making.

That being said,  I invite one and all to join me in a  creative weekend  where I will be teaching the  fundamentals of draping skill.  C’mon and play with fabric on the  small mannnequin!

The 2 day class is called  Weekend Draping Intensive and is being held at  Workroom Social  on April 2 and April 3 2016. Workroom Social is a relaxing, friendly  Brooklyn, NY sewing studio where you can learn something new, increase your sewing skills in a fun way, and meet new friends in the  local sewing community.

What’s great about this class is that you will  be able to  learn and understand how some of the basic building blocks of garment patterns ( called slopers )are formed. You’ll learn  how to  first create slopers,  and then learn how to  reform and reshape those basic   patterns to form  some of the simple  fashion styles that you love to wear.  Although you will be learning  how to drape and create  on the small mannequin, the same core  principles of  draping and pattern creation  you  are learning  will translate well into what you can do for your own sized garment patterns.

Now to give a fair “head’s up”, this class is for the  advanced beginner sewing person. Anyone  just starting out in sewing and not knowing a thing or two about garment making might feel a  little overwhelmed. But for those of you who have conquered zipper insertions, know  a small  bit about using  sewing patterns, and are familiar with sewing straight and curved seams, I invite you to  expand yourself and see where learning simple  draping skills can take your  sewing skills. This  Weekend Draping Intensive may be just what you need to help take ( or kick..) your creative garment making UP a notch or two!

Checkout  the Workroom Social website for more details and class description!

Happy sewing and see you in April !!

Sharon


New Tool in the girl cave…

This will be short!

Nope- I’m not trying to  show off to anybody.  Just wanting to declare gratefulness. I am truly blessed.

So I said to Santa- ” PLEASE SIR, you cannot go to your midwinters’s nap, and sleep for the year without first  CONSIDERING giving me my ChristmasHannukahKwaansaNewYearbirthdayValentines’ gift.  I know how sleepy you are after your holiday run, but think about it!” He considered my request, looked at my last blog post and archives, and decided that my sewing skills might be worth the giving.

“You keep on sewing there, girlie girl”, he said to me in a loving fatherly manner as he yawned and went off to sleep till next Christmas.

” Yes sir, yes sir – I will !!  THANK YOU, Santa” I said.

New tool in the sewing room (a.k.a girl cave ) to  get creative with. I am very grateful and feeling very blessed. Now to start  the sewing worthy of the gift. One stitch at a time.

IMG_2171.jpg

January Retreat time- got the pattern DONE!!

IMG_2126.jpg After a wonderful but very busy Christmas and New Years season (oh Yeah – Happy 2016 to you all !), I paused to take some time off, get some ME time for my birthday, and go on a sewing retreat weekend with the New Jersey  chapter of The Association of Sewing and Design Professionals (ASDP or – for the old school folks  out there who know the history- they were also  known as PACC..).

I took my little machine – my “jackknife” Pffaf- and had a great  sewing time. It was a wonderful gathering of sewing women from all walks of sewing and life. We mostly  had  ASDP and American Sewing Guild ( ASG ) folks. The best thing was having TIME and a ” free sew ” weekend  and doing anything from garment sewing, to quilting, to  doll clothes, with garment projects being the bulk of what people brought to sew on.

.IMG_2124.jpg  What I  appreciated the most is that  on the retreat I made the time to FINALLY finish the pattern for a jacket  that’s in a suit pattern that had been sitting in my pattern stash for years. YES I will confess the sewing sins that I am thinking most sewing folks have but might be ashamed to confess–  I have  patterns that I buy that  I SAY I will get  time to make, but then never get the time in my busy life to make them, and so they sit for years!! Well this retreat was the chance to focus on one of THOSE kinds of patterns.

IMG_2130.jpg  IMG_2128.jpg IMG_2129.jpg

This pattern and I have a convoluted history. SOMEWHERE in my   life and sewing journey  I acquired this ( ???) late 1940’s/ 1950’s vintage pattern. LOVED it.  The  Good News–Loved the pattern  so much that I made a copy of the original  front pattern envelope with  back and front views of the jacket and suit. Bad News–  while being efficient enough to keep  all the original pattern pieces in a bag, some how I LOST the original pattern envelope and instructions. RATS!!!!

More bad news! As you can see in my copy of the original pattern envelope, a small flap of paper had, unnoticed by me,  folded down in the copier  machine and HIDDEN the original pattern number.  Lost the envelope  and instructions before I could record the number.  DOUBLE RATS!!!   Being that the original  pattern was ” size 14 –Bust 32 in, Hip 35 in “, without the original pattern number, I could not even do research with McCalls / Vogue patterns to find  the pattern number or even  to start a petition for them to re-issue the pattern in modern day sizes. (If any of you  folks have a  random copy of this pattern hidden away in your stash and can  post or email me the pattern number, I’d be grateful.)

OH YEAH— the answer to your question is NO- I CAN’T look at the pattern pieces for the pattern number. This is a REAL vintage pattern. As you can tell by the picture of the  skirt portion of the pattern below, it is all BLANK  cutout pattern pieces with holepunch to indicate pattern piece names, seam allowance, notches, dart placement, and pleating placement.  There is no  printing on the pattern at all. This was VERY NORMAL for pattern companies to  not have printed info on published patterns  “back in the day”. They assumed you  could take their blank, one sized pattern parts  out of the envelope, and their  printed instructions for sewing the garment, and  gained sewing skills from Mama, Grandma or your Home Economics class, in order to figure  the sewing  all out.  Hey- it worked back then, somehow.

IMG_2159.jpg

This pattern has sat for four+ years ( at least..) in my pattern stash with good intention to create, but with no follow through. I knew for me it was going to be a lot of work to attempt to realize the garment from paper to cloth and have it to fit me.

SO– with only  a picture of  an unmarked hole punched , lost numbered pattern, that is not my size (for REAL y’all– my hips haven’t been 35 (in) since BEFORE I was 35..LOL)  and  not having any reference instructions for how to construct this thing, I just decided I was going  to use my draping, patternmaking and sewing skills and GO FOR IT.

I looked at the picture !! Visually broke this sucker down into it’s basic parts that I felt made up the WHOLE of the garment. For me this is a  tailored notched collar, raglan sleeve jacket, with hidden placket front closure, double welt ( curved ?? vs straight ) front pockets, and also with released pleats radiating in sunburst pattern from the circle of the neckline and into the body of the jacket. Yep- a mouthful, but that’s what it looks like to me.

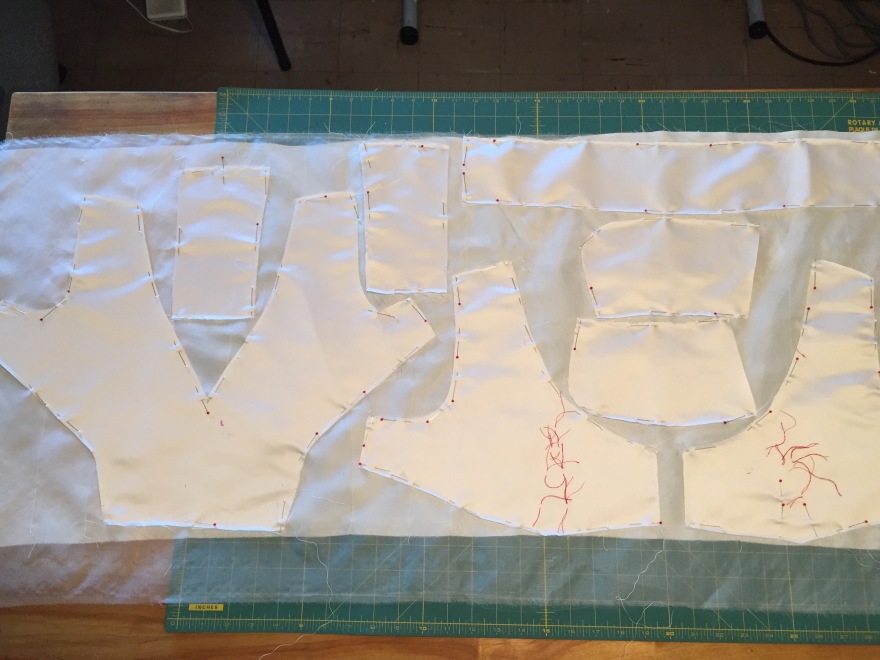
I have draped and refined this pattern  on my mannequin about three times. Started with Flat patternmaking of the plain raglan notched collar  jacket and adding the position of the released pleats on the flat pattern draft. Went to the  fabric draping of the  paper drafted pattern and   got half baked results.  I was not happy with the fabric muslins. Lots of kinks to knock out. It was mainly issues related to wanting to get the  sunburst released  pleats placement  in right balance with the raglan seams and raglan shoulder darts.  Looking at the illustration, the pleats end and release in the body of the jacket in such a way to form that level  circular pattern  around the body of the jacket. Also had to contend with all of that pleating in the neckline supporting the  notched collar properly, and having it all  to fit me well.

I needed to turn the  muslin pattern into paper form because I also was needing to do a full bust adjustment and dart manipulation to move some of  the under bust fullness into the neckline.    Because I have a full bust, I turned some of the manipulated under bust fullness into  the first released pleat in the front jacket (pattern pictured below ) AND into a dart located under the notched collar- which supports the tailored collar and front jacket  to laying nicely over my full bust.  As mentioned, I was not happy with the  fabric muslins, but trial and fitting had moved the project forward to that retreat  weekend.

IMG_1681.jpg IMG_1686.jpg IMG_1682.jpg

LASTLY—what I have basically pictured is my   “outside  of the box- make it work ”  combining  of  my skills and draping  the final  developed flat  pattern paper version of the jacket on the mannequin.  I then  could do the final draping in paper of the notched collar. I had one of the ladies  on the sewing retreat help me to  fit  the paper pattern to myself  “Palmer Pletsch style”. ( Thank you Lena S.)

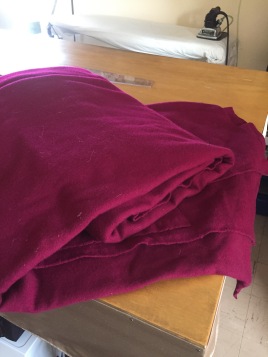
I think I’m happy with what I have got in paper .  I think I am done doing muslins  for this jacket. I have done two fabric and a paper fitting. The paper pattern in DONE. I will create a lining pattern( without  pleats) and  I’m just gonna go for it in fabric  using the Berry colored mid to light weight wool pictured. Hoping to get it done to wear to church on Easter- weather cooperating. After all this work I do not plan to leave the pattern un-sewn for very long,  but I ‘m not promising anything on the timing of sewing completion. I will  see what I will see in this pattern.  I am glad to have gone on  sewing retreat, spent time with  inspirational sewing women,  and had the time to make progress on the pattern, and that its DONE.  WHOO HOO!  I will keep you posted on the sewing progress. Happy sewing  in 2016!

IMG_2127.jpg     IMG_2131.jpg

IMG_2160.jpg IMG_2132.jpg


Fall Weddings

IMG_1972.jpg 
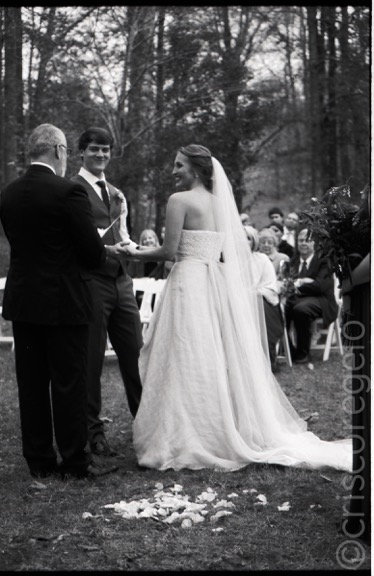
So-the other thing I was doing this fall was to create two wedding gowns. Each not very elaborate or “show-y” or of the “CakeTop” variety -as per request of each individual bride.  For one bride I have a lot to record here for  your viewing pleasure and for my sewing  memory of what I did.  I will call her Bride “A” since her name (Andrea) begins with ‘A’. The other bride?  Not so much to show- as that particular  bride was a little  more camera shy, and has also not sent me any pictures of her IN the dress on her wedding day as yet . I will call her bride “B”.

Ok- so we  all already know I am not Susan Khalje when it comes to wedding dresses and sewing. But  with the  short time lines I had for each bride, I put in what I felt was my best for each – hoping to make them each feel beautiful on their wedding day. Basically what I did was create corsets for each bride and then build whatever style they liked on top of the under corset. I did that so  each bride did not have to  hunt and search the world for undergarments that would work with their chosen dress designs. Having the proper undergarments is usually  half the battle with making  ANY dress or garment look good on you. For Bride “B” the corset was sewn in and incorporated into the dress itself. Although I know she wore much MORE than that,  I made it possible so that all that Bride “B”really needed to wear with her dress was a clean “birthday suit”. Gonna start backwards and  show Bride B first.

Bride “B” wanted an organic cotton, strapless, sweetheart neckline, A-line,  lined in silk and cotton,  floor length dress, with a 4 foot long (church length) train.  That sentence was a mouthful, but  the dress got done!! We put a crinoline  under the skirt for a gentle “poof” underneath. Bride and her mom picked out  the lace for the bustier part of the dress. I thought it was a beautiful lace choice. I made the dress, laid  and positioned the lace to the bustier part, and because of time constraints, I got a bit of help from the  bride’s mom with the hand sewing of the lace to the outer shell of the dress.  It seemed a successful outcome to me. Can’t wait to see pics of the bride in the dress.  If I can, I will document those pics to the blog in the future.

IMG_1982.jpg
Midway in the process-A corset fitting for bride “B”
IMG_1993.jpg
Looking at the inside of the final corset built within the dress…

IMG_1994.jpg

IMG_1995.jpg
Finished dress lace…

Moving on to Bride “A”. More pictures to show. This  gal wanted something simple but wanted to be a little more refreshingly creative and not have an all white or all cream colored dress. After creating the corset of all cotton (for wearing breathability), I then created the wedding gown from off white silk duchess and silk chiffon.  The bride had the idea of incorporating a beautiful turquoise Ombre print chiffon panel into the dress.  I pleated the panel in order to concentrate the various levels of color and  to enhance  the ombre effect.  The panel was inserted into the empire seams on the left side of the dress and created a “waterfall” of increased color saturation down that side. Again- I liked the creative idea and use of color in a wedding gown.

Bride “A” and I came up with the design for her gown just from brainstorming together. And YES sewing fans- and those of you savvy enough to tell by looking at my muslins- I had a busy fall schedule. I did “quick and dirty” draping  of this gown pattern  right on the LIVE bride  “mannequin”- using TOTALLY unorthodox draping techniques.  I will probably be kicked out of the F.I.T. Alumni club. Oh well…  All I can say is  that the  wedding gown got done ON TIME , on budget,  it fit her, and the bride was comfortable in the gown  and  HAPPY on her wedding day !! Same goes for Bride “B”.

What more could a dressmaker ask for?

My THANK YOU goes to GOTHAM QUILTS in NYC for being a great place to be inspired by color…..

IMG_1905.jpg IMG_1924.jpg

IMG_1929.jpg
Added a layer of very lightweight flannel to the corset =helps conceal the metal bones from showing through the fabric. THANK YOU Sarah Veblen for that tip IMG_1925.jpg IMG_1926.jpg IMG_1932.jpg IMG_1934.jpg 
IMG_1913.jpg
  Cup adjustment… IMG_1933.jpg IMG_1953.jpg 
IMG_1915.jpg
Initial draping

IMG_1952.jpg

IMG_1946.jpg
First muslin.. IMG_1948.jpg IMG_1949.jpg 
IMG_1955.jpg
Tweeking the bodice fit on muslin #2

IMG_1957.jpg IMG_1965.jpg

IMG_1974.jpg
Stay tape to stabilize the neckline and armsceye on the underlining. Conquered that curvy princess seam-whew!!
IMG_1975.jpg
Flat chiffon ombre panel …
IMG_1976.jpg
Pleating the panel…


IMG_1978.jpg
The Bride requested cap sleeves…
AD dress 4.jpg
Happy wedding day!

AD dress 3.jpg AD dress 2.jpg AD dress 1.jpg


Last bit O’Fall 2

IMG_2068.jpg

So I had such a good time  up  in the fall foliage at Camp Workroom Social  (-see previous November post Last bit O’Fall …) I decided to go apple picking the very next weekend with my niece in a upstate orchard. Nice to get out of the the city for a day and enjoy the last  bit of peak foliage. Because it was so late in the season, there were hardly any apples left on the trees, but we enjoyed the walk in the orchard acreage and staring at the Catskill mountains, breathing clean air and  letting the city stress out of our heads. We had our “pick” at the various kinds of apples the orchard had gathered up and collected for purchase from their trees late in the season. Been enjoying the apple pie and even have a few pies  in cold storage waiting to bake for Turkey Day. IMG_2050.jpg

IMG_2047.jpg
Paula and Auntie Sharon…

IMG_2040.jpg

Other than that,  instead of Octoberfest, I had a mini “Bra- toberfest” of my own, as well as continuing sewing on my “UFO” pile. The navy blue/cream color bra with side cup lace is one that  I started up at Camp WS between  Melissa’s fitting sessions= now completed. ( Yes, yes- those of you who think I should be just like all the other blogs in the world and  only show pics of myself wearing cloths that I have made for myself, your day is coming. For right now, just have a peek at the workmanship I’ve put into my underwear. 😉   More to come…

IMG_2070.jpg IMG_2071.jpg IMG_2080.jpg IMG_2083.jpg IMG_2084.jpg

IMG_2063.jpg IMG_2082.jpgIMG_2081.jpg IMG_2085.jpg

HAPPY THANKSGIVING TO ALL. EAT BIG.